
This tutorial provides the steps to arrange the Billing Details and Order Review elements on the WooCommerce checkout page in columns.
Before:
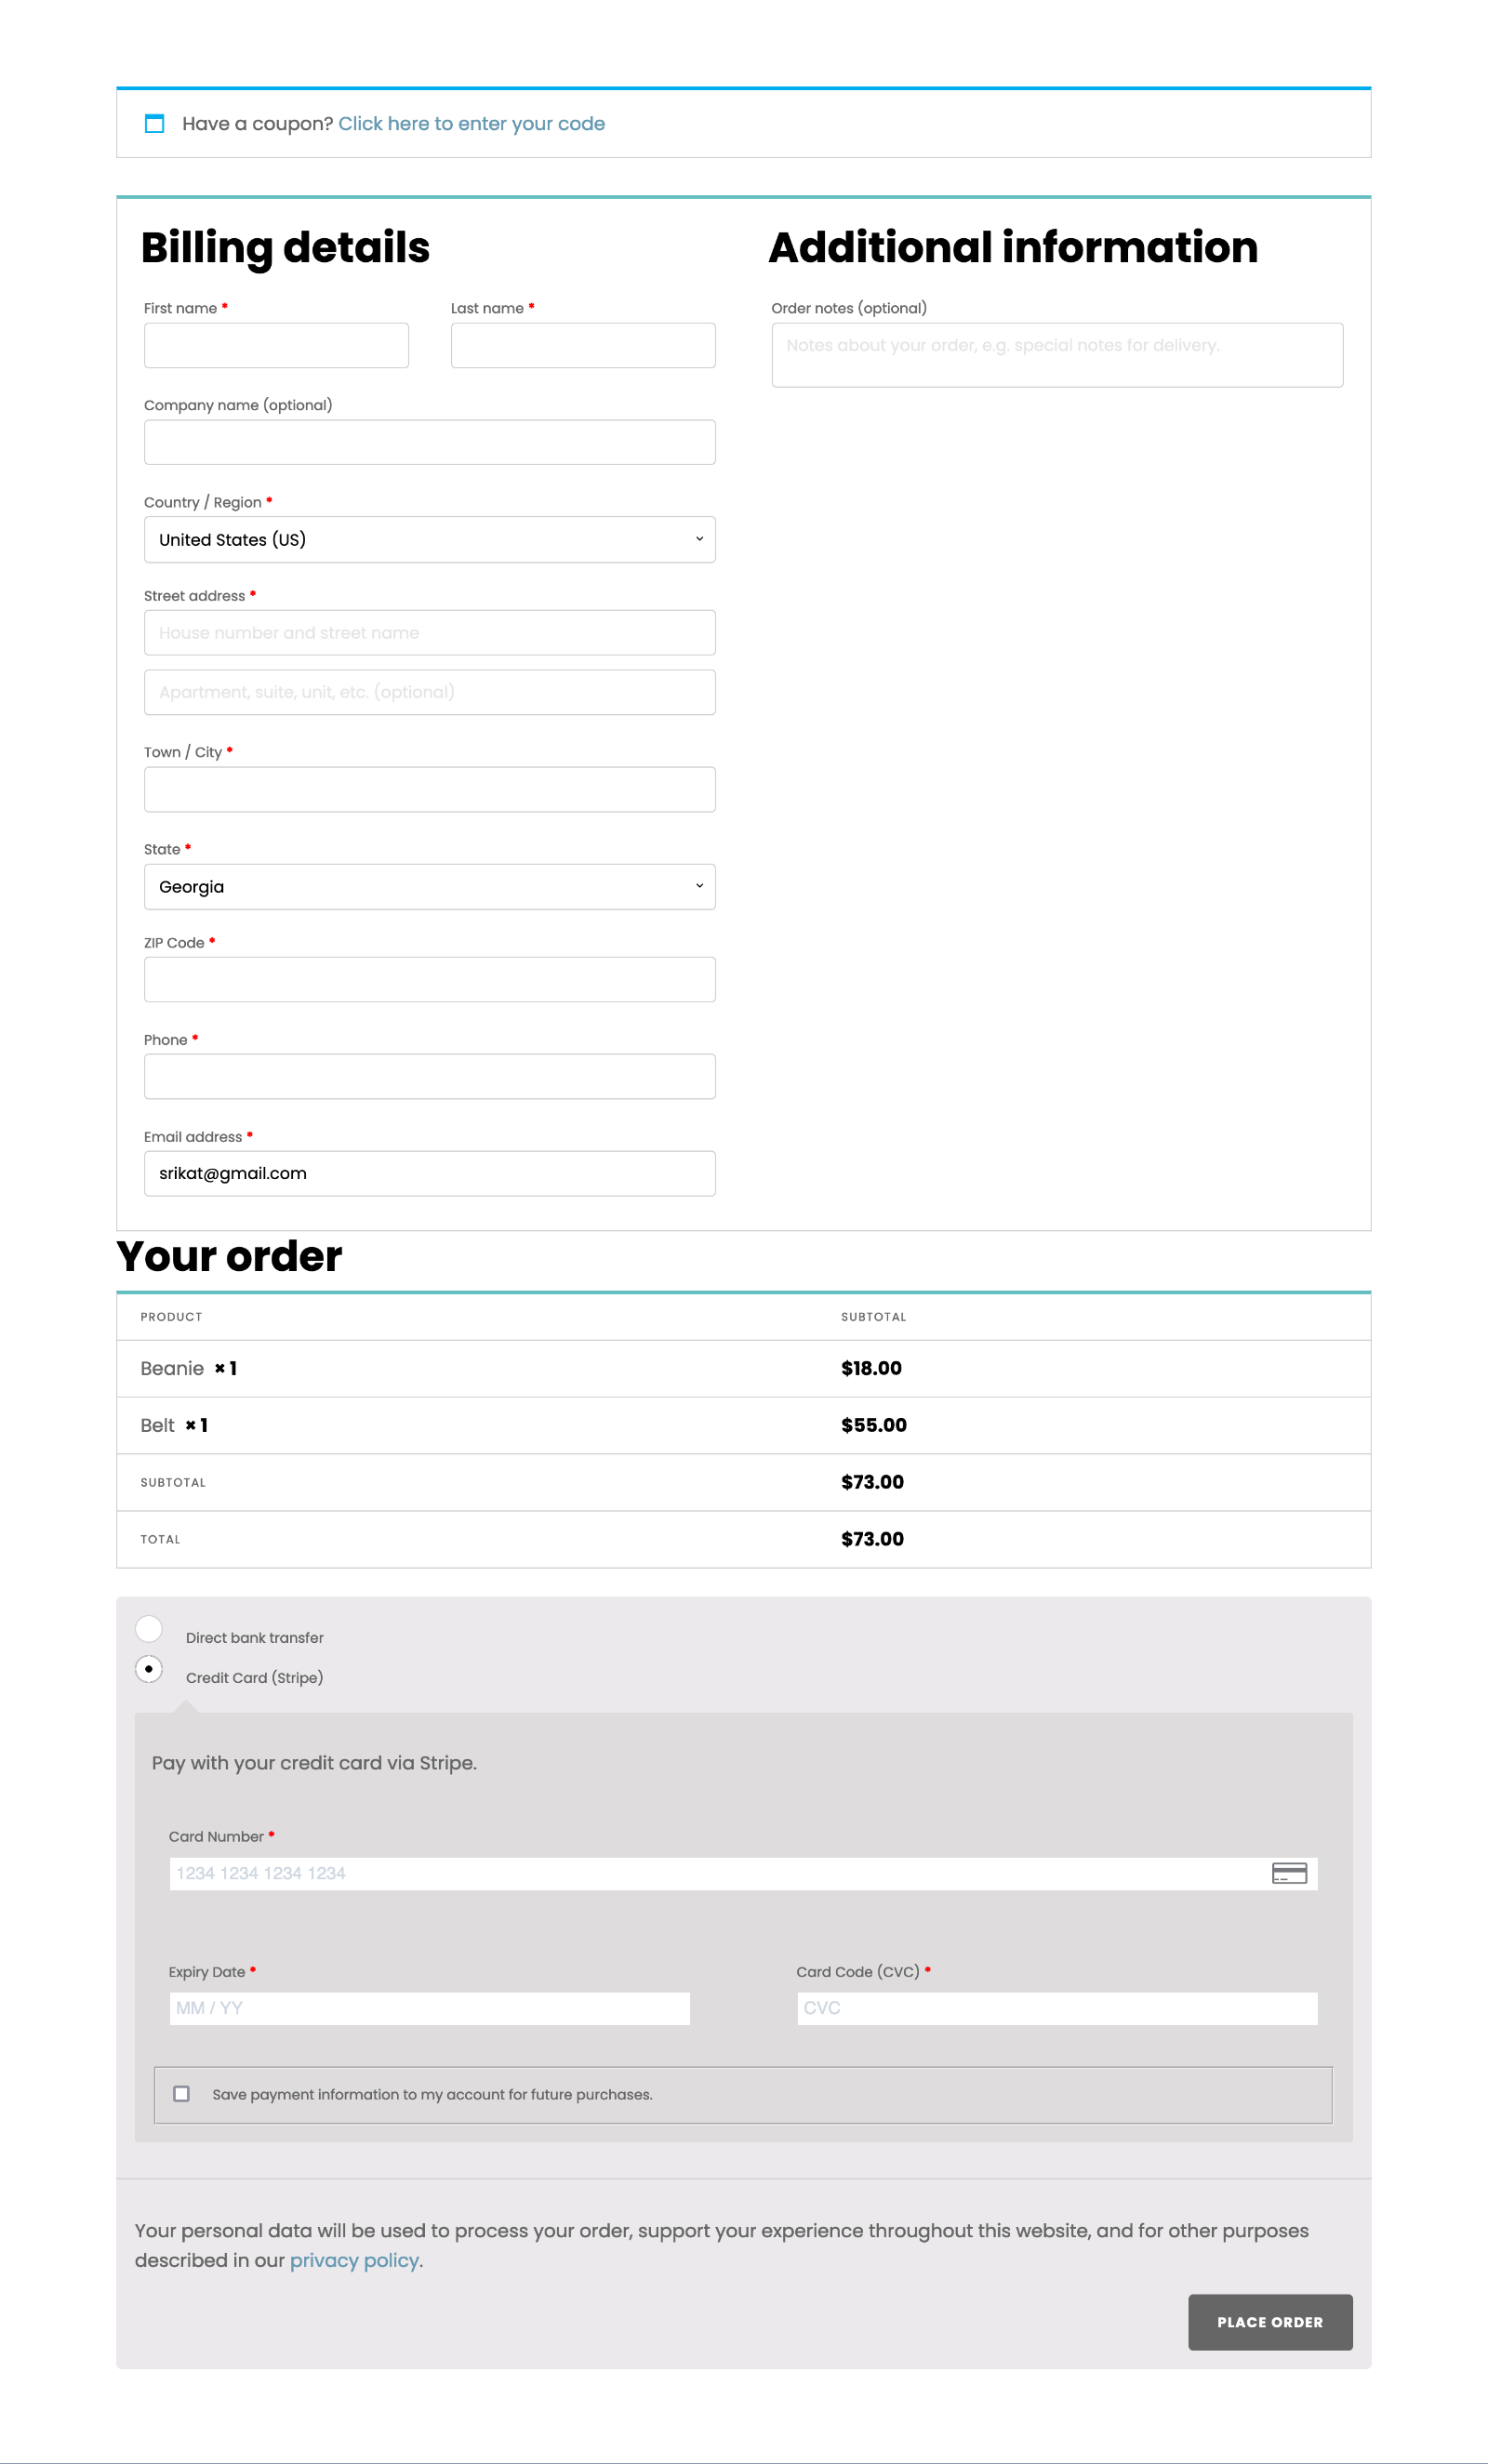
After:

Note: Tested in a WordPress site running Oxygen builder.
Step 1
Inspecting the checkout page with browser’s DevTools, we can see that the checkout form has 3 elements:
- div#customer_details
- h3#order_review_heading
- div#order_review
Let’s wrap the order review heading and the order review into a single div.
Opening WooCommerce plugin’s folder in a code editor like Visual Studio Code and searching for id="order_review_heading we find one hit: /wp-content/plugins/woocommerce/templates/checkout/form-checkout.php.
Here we see two lines of interest:
<?php do_action( 'woocommerce_checkout_before_order_review' ); ?><?php do_action( 'woocommerce_checkout_after_order_review' ); ?>
We can hook a custom div opening tag to woocommerce_checkout_before_order_review so it gets output above the order review heading and the corresponding closing tag to woocommerce_checkout_after_order_review.
Install and activate Code Snippets plugin.
Go to Snippets > Add New.
Title: Wrap Order Review Heading and Order Review
Code:
add_action( 'woocommerce_checkout_before_order_review_heading', function() {
	echo '<div class="order-review">';
} );

add_action( 'woocommerce_checkout_after_order_review', function() {
	echo '</div>';
} );
Set the snippet to run on the front-end. Save changes and activate.
Step 2
Add this CSS:
@media (min-width: 992px) {
	form.woocommerce-checkout {
		display: flex;
		gap: 40px;
	}

	#customer_details .col-1,
	#customer_details .col-2 {
		width: auto;
		float: none;
	}

	#customer_details .col-2 {
		margin-top: 40px;
	}

	/* Fix for Woo notification breaking 2 column layout */

	form.checkout.woocommerce-checkout {
		flex-wrap: wrap;
	}

	.woocommerce-NoticeGroup-checkout {
		flex-grow: 1;
	}
}