
Most WordPress themes and plugins nowadays come with a method to load and use Google fonts.
There could be times when you want to do this manually like in the case of Oxygen 2.0 not being able to render the “Nothing You Could Do” font on the frontend.

Follow the steps below to load a google font-family in your WordPress site:
Step 1
Install and activate Code Snippets plugin.
Step 2
Add a new Snippet having:
add_action( 'wp_enqueue_scripts', 'custom_load_google_fonts' );
/**
 * Enqueues google fonts.
 */
function custom_load_google_fonts() {

    wp_enqueue_style(
        'custom-fonts',
        '//fonts.googleapis.com/css?family=Nothing+You+Could+Do:400',
        array(),
        '1.0.0'
    );

}
In the above replace Nothing+You+Could+Do with the string that’s shown in the EMBED tab after you have selected the font and clicked on the black bar near the bottom right edge of your browser.
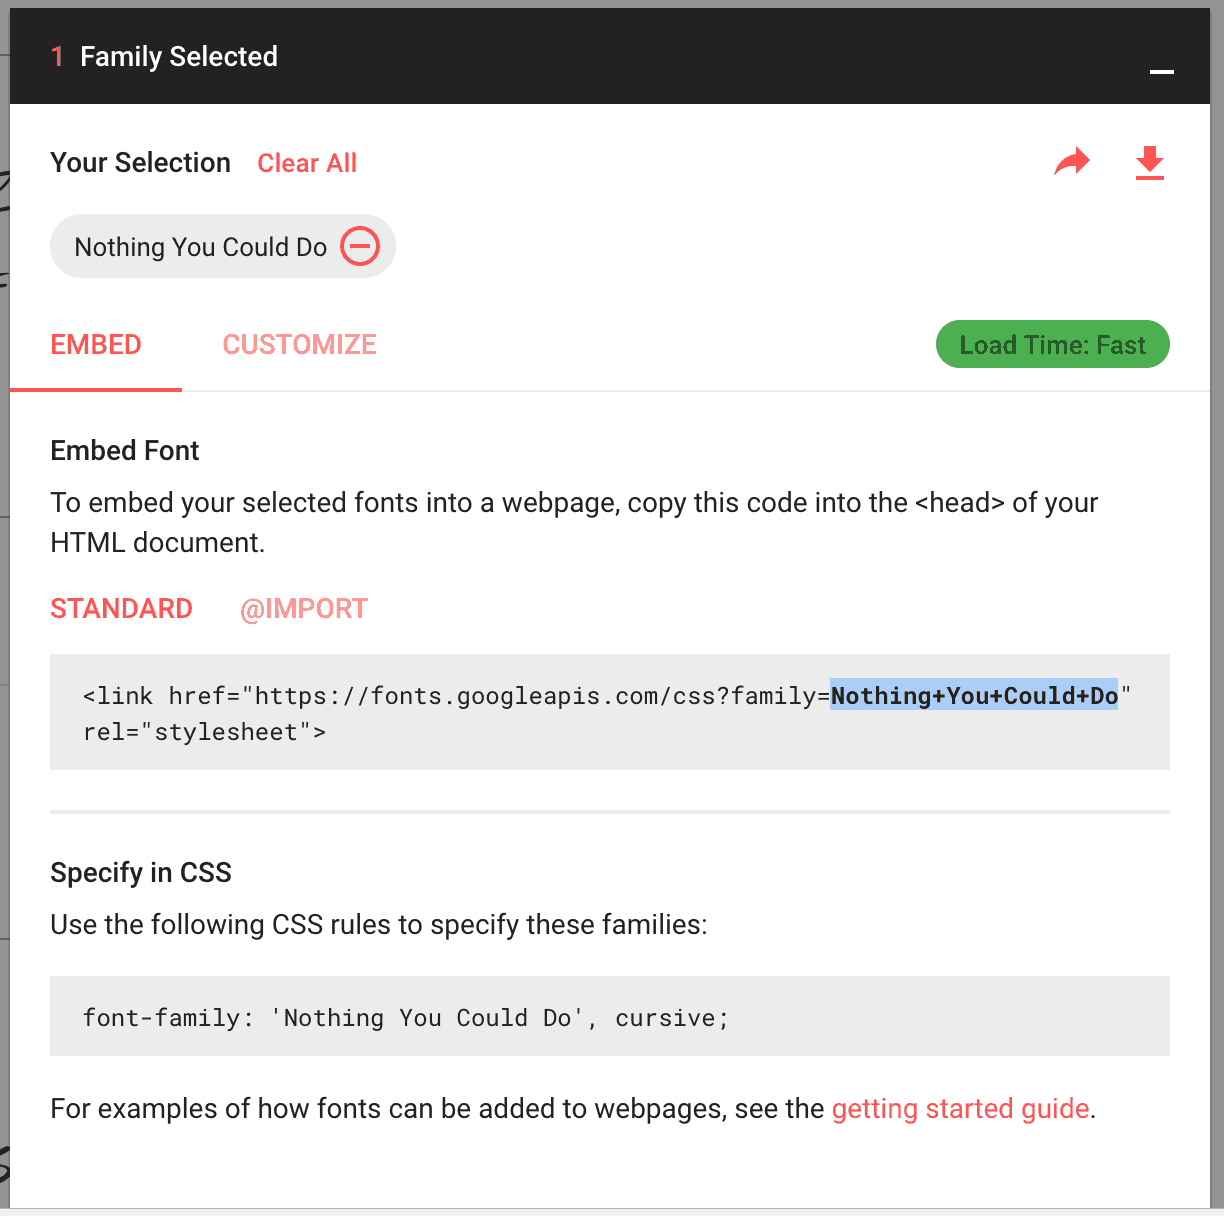
400 represents the font-weight.
To add more available font weights, separate them by a pipe like so: Source+Sans+Pro:400,400i,600,700.
If you are using Oxygen, set the snippet to run on the front-end since Oxygen renders the fonts fine in its editor.

Step 3
Specify the font-family in CSS for your desired element(s).
Ex.:
.my-text {
    font-family: 'Nothing You Could Do', cursive;
}
This step is not needed in Oxygen as long as you have set this font in the editor.