WordPress has a sticky option for the standard Posts but not for Custom Post Types.
This is where Sticky Posts – Switch plugin comes handy.
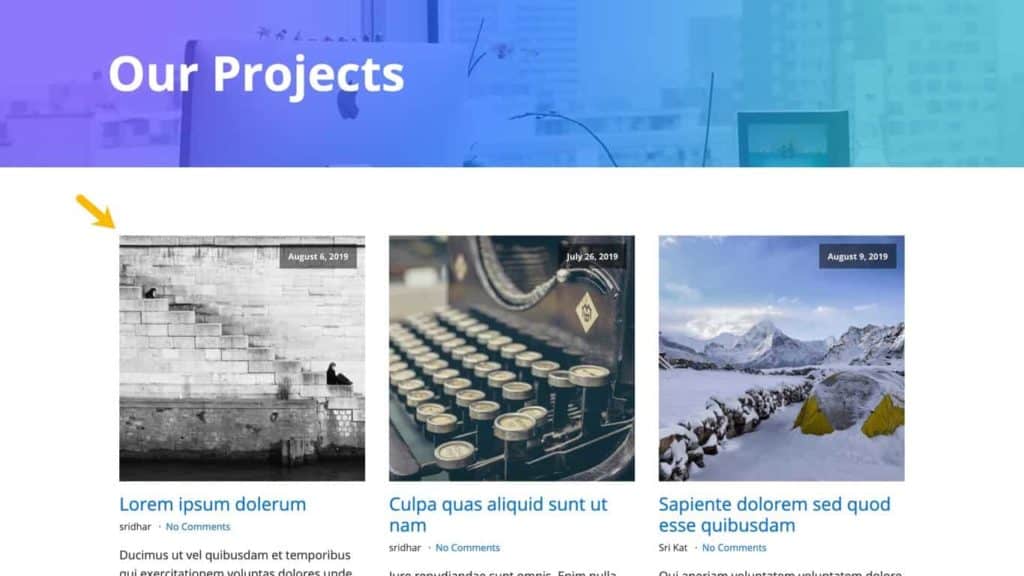
In this tutorial, I show how Sticky Posts – Switch plugin can be used to make specific entries of a CPT sticky and make them appear before others in the CPT archive page.
Step 1
Install and activate Sticky Posts – Switch plugin.
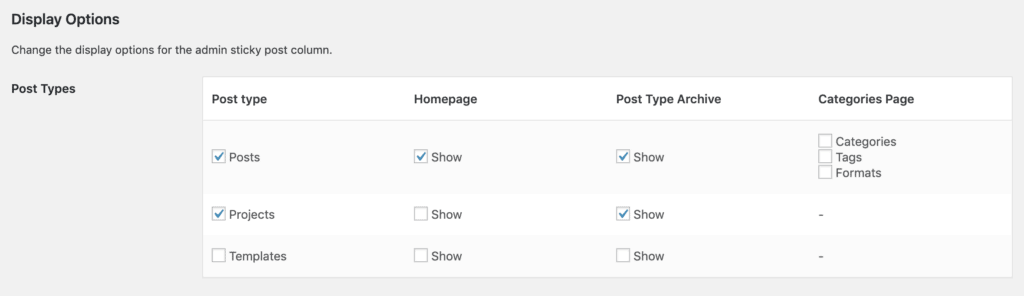
Go to Settings > Sticky Posts – Switch.
Check your post type(s) for which you would like to add sticky posts functionality.
Also check the Show option under Post Type Archive column.
Step 2
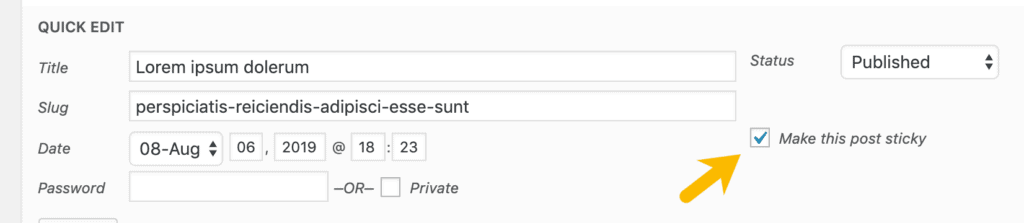
Go to your CPT list screen in WP admin.
Click Quick Edit for entries that you wish to show before others in the CPT archive page and tick “Make this post sticky”.
Step 3
If using Oxygen, create a Template for the CPT archive.
Add an Easy Posts component.
The sticky posts will automatically appear before others.