Team page with Content and Custom Fields in Lightboxes in Oxygen
This members-only tutorial provides the steps to display entries of a team_member custom post type as a grid of featured image and title which when clicked opens a lightbox having the title, value of job title custom field, featured image, entry content and other custom fields like email and Linkedin links.


Step 1
Let us register a custom image size for the team member images.
Install and activate Code Snippets plugin.
Add a new snippet titled say, Custom image sizes.
Code:
add_image_size( 'team-image', 280, 280, true );Save changes and activate.
Step 2
Let us register the new CPT.
Install and activate Custom Post Type UI.
Go to CPT UI > Add/Edit Post Types and create the team_member post type.
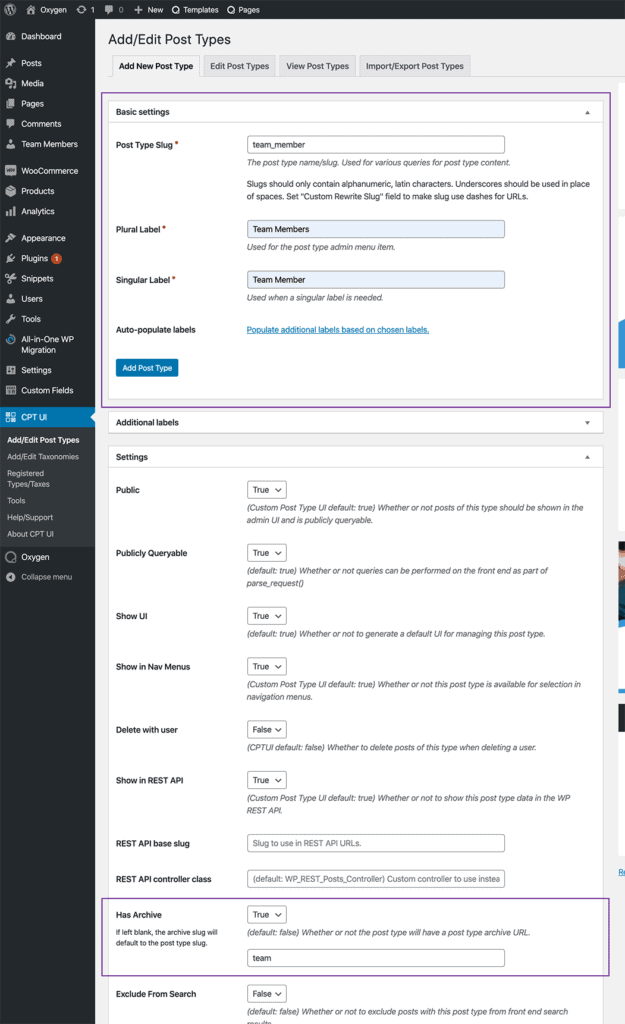
Set Has Archive to True.
Enter team as the CPT archive slug.
Step 3
Install and activate Advanced Custom Fields.
Create your desired custom fields for the team_member post type using ACF (free or pro).
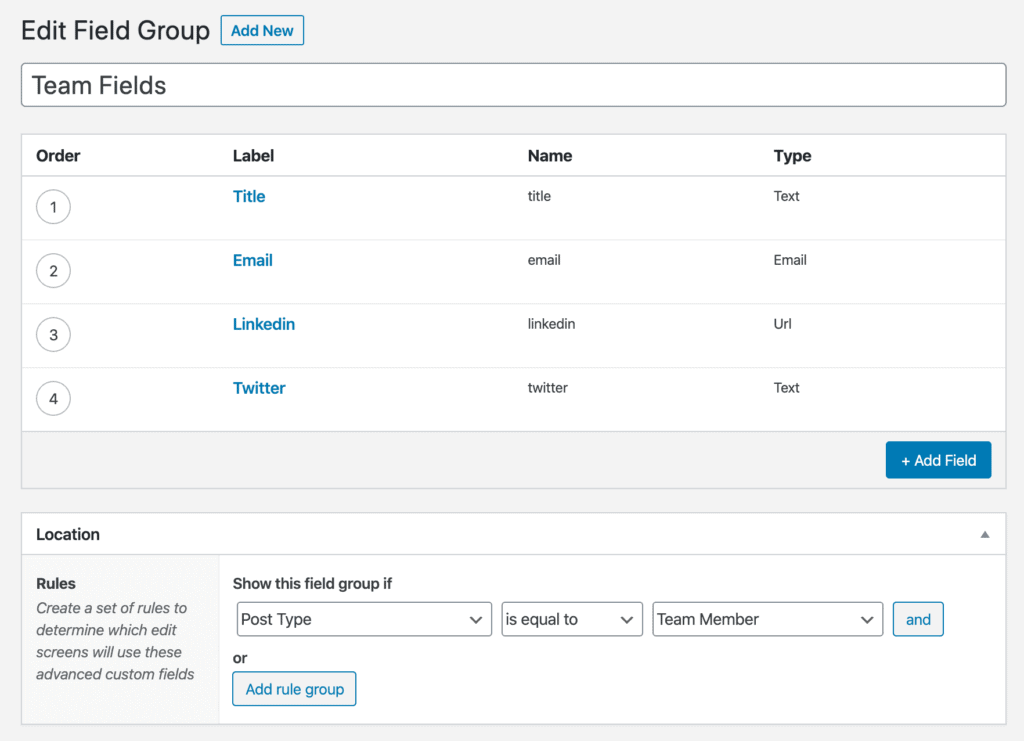
Here's the export file of the above fields from my test site.
Step 4
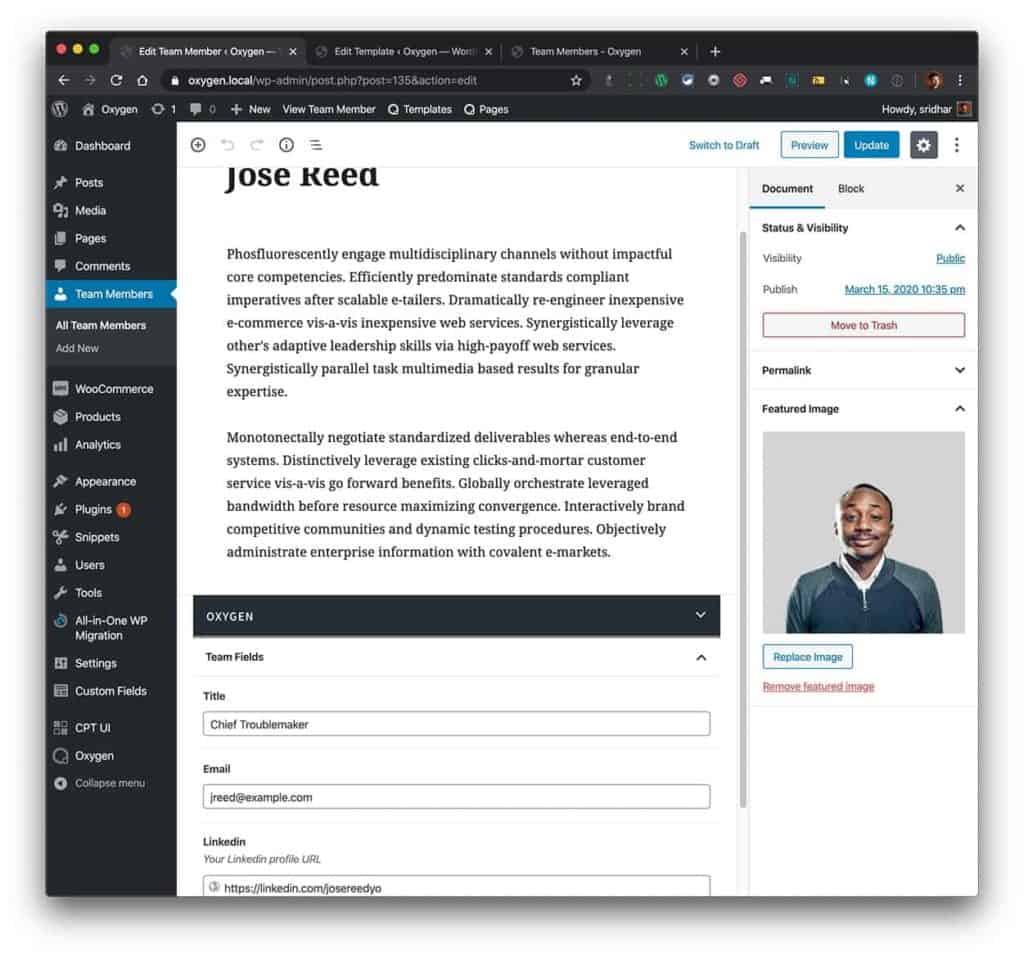
Go to Team Members > Add New and add your team members.
Step 5
Load Lity, a lightweight, accessible and responsive lightbox on the CPT archive.
Install and activate My Custom Functionality plugin.
Edit the plugin's file, plugin.php and add the following inside custom_enqueue_files():
if ( is_post_type_archive( 'team_member' ) ) {
	wp_enqueue_style( 'lity', plugin_dir_url( __FILE__ ) . 'assets/css/lity.min.css' );

	wp_enqueue_script( 'lity', plugin_dir_url( __FILE__ ) . 'assets/js/lity.min.js', '', '3.0.0', true );
}
Step 6
Create a new Oxygen Template for the CPT archive.
Go to Oxygen > Templates > Add New Template.
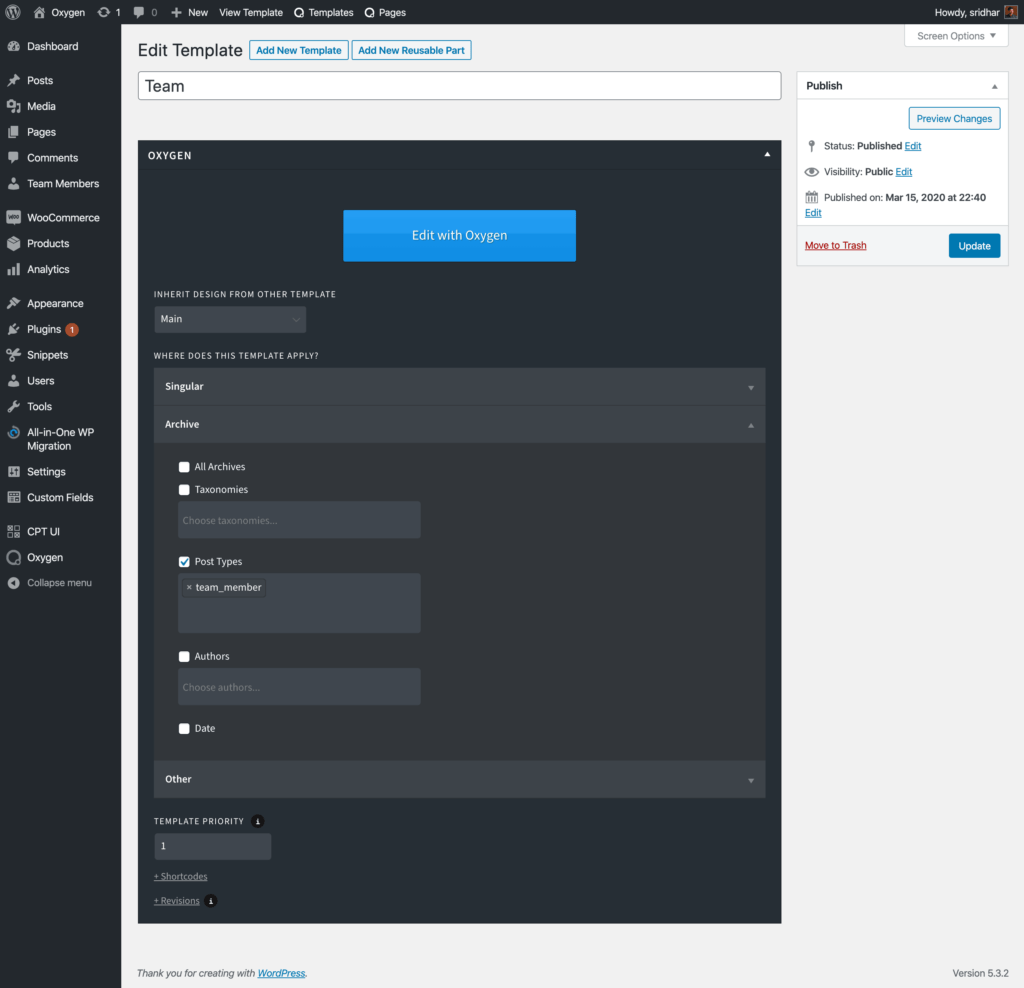
Click Edit with Oxygen.
Add a Section.
Add a Heading and change the text to say, "Our Team".
Add an Easy Posts component.
Templates > Template PHP:
Replace the entire existing code with:
This is a premium members-only content.
To view the rest of the content, please sign up for membership ($47/month or $599 one-time).
Already a member? Log in below or here.