There might be times when you want to load custom fonts generated by uploading a ttf file to a @font-face generator site.
In this tutorial, I show how this can be done using a custom functionality plugin.
Step 1
Install and activate My Custom Functionality plugin.
Step 2
Upload the .ttf file that you purchased/provided by the designer/downloaded to a site like Font Squirrel or Transfonter.
If using Transfonter, check EOT. Add your font file, click Convert button to download the zip file.
Extract it.
Step 3
Connect to your server via a FTP client and navigate to wp-content/plugins/my-custom-functionality/assets.
Create a directory named fonts.
Go inside fonts directory and upload the individual font files i.e., the files having the extensions of .woff, .woff2, .eot (and in some cases, .svg).
Do not forget to upload the .ttf file.
Step 4
Go inside the css directory and create a file named say, fonts.css having the following:
@font-face {
    font-family: 'Futuris';
    src: url('../fonts/Futuris.eot');
    src: url('../fonts/Futuris.eot?#iefix') format('embedded-opentype'),
         url('../fonts/Futuris.woff2') format('woff2'),
         url('../fonts/Futuris.woff') format('woff'),
         url('../fonts/Futuris.ttf') format('truetype');
    font-weight: normal;
    font-style: normal;
}
Replace Futuris with the name of your font.
Your downloaded package should contain a css file having code similar to the above from which you can get the font name.
Step 5
Edit wp-content/plugins/my-custom-functionality-master/plugin.php.
Inside custom_enqueue_files(), add
wp_enqueue_style( 'my-custom-functionality-css', plugin_dir_url( __FILE__ ) . 'assets/css/fonts.css' );
Step 6
Now select your element and apply the font-family.
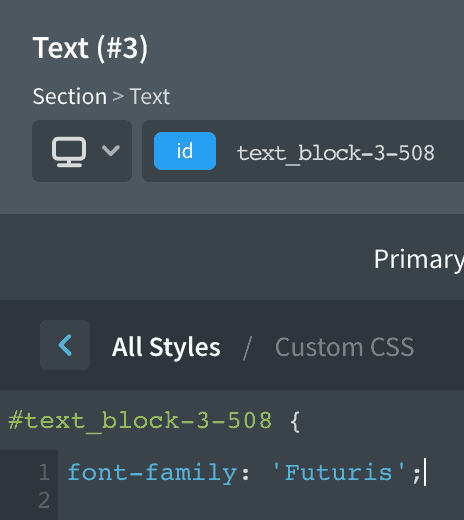
If using Oxygen, you could go to Custom CSS under Advanced and add a line similar to
font-family: 'Futuris';

Your custom font should now appear on the frontend.
